Setup your first Escalation Rule in Rocketship
When you first setup your account in Rocketship, most of the needed default settings and rules are created for you. However, not all of the rules are enabled. We do this to ensure Rocketship only updates tickets, service calls, etc., when you are ready.
One of the first “show stoppers” is enabling your first Escalation Rule. (To better understand Escalation Rules, read this overview.) Let’s walk through a very basic setup of your first Escalation Rule so you can begin testing/using Rocketship’s unique dispatch/schedule/escalation features.
- Log into Rocketship Admin
- Click on Dispatch&Escalations
- In the Escalation Rules window, click View next to the Escalation Rule “Default”
- Click “Escalation Tiers” on the right
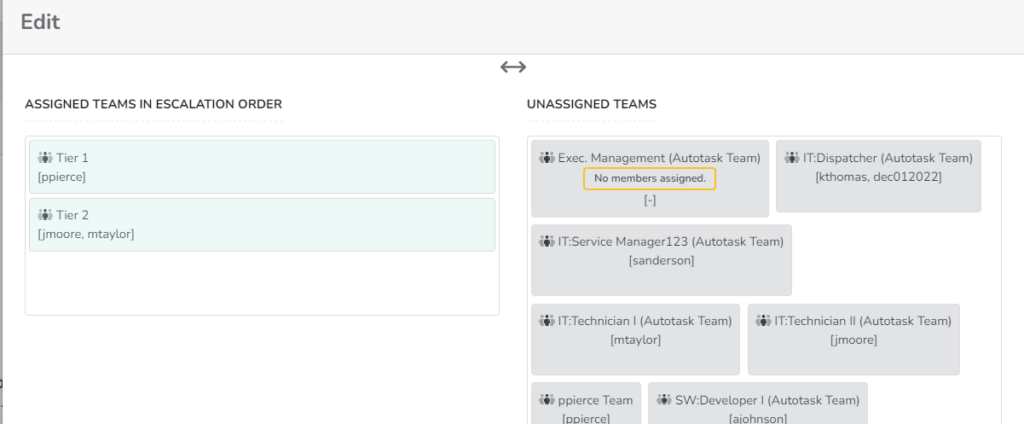
- Drag&Drop your dispatch/triage team and your technical team in the order you want dispatch/escalations to occur (refer to screenshow below)
- Click Save Changes
- You are back at the Escalation Rule: Default screen
- Click Enable
Your first Escalation Rule is enabled. Nothing will happen yet because you have to instruct Rocketship when you want it to process a ticket, but the Escalation Rule is ready for use during a dispatch or escalation.
Take a look at HOWTO create your first escalation rule here.

